Blog 1
Week 1:
Our group decided to walk around W3 as we wanted to visit the "haunted" place near the workshop 👀. Through our bonding session, we learned more things about each other, like what CCAs we were in and what electives we chose.
(Isabelle took this photo😁).
Week 2: Chemical Product
The chemical product our team decided on was a portable blender.
Main Category: Household
Sub-Category: Electronics
The 2 main chemical engineering principles that the portable blender uses are Reaction and Mechanical.
The process of blending fruits in the blender is a type of batch process as the user will first add fruits into the blender. After the blending process has finished, the user may take out the product and add more items to blend. As there are things being taken out of the process instead of proceeding continuously, it is a batch process.
Since the blender blends different fruits and drinks together, it incorporates a mechanical chemical engineering principle into its operating principle as well.
In Practical 1, we learned about the reverse engineer principles of a coffee maker BD100®. In order to do this, we first had to observe how the coffee maker operates normally.
We also had to calculate how much energy the coffee maker used to brew the coffee.
Operation of the coffee maker
1. First, we added coffee beans into the filter holder and water into the water tank of the coffee maker.
2. Once we turned the switch on, the brewing process began!
3. We had to take the power rating of the coffee maker at 3 separate time intervals, and stopped when the coffee had finished brewing. This was so that we could find out how much energy the coffee maker uses to brew the coffee. We knew that all the water had run into the filter holder when the power rating dropped to 0.
4. Afterwards, we proceeded to measure the temperature of the coffee in the jug, and the volume of coffee in the jug using a measuring cylinder.
We went on to separate the heating element from the base of the coffee maker. We agreed that the water would get heated up by the heating element by flowing through it from one orang tube to the other. It was then we realized that the orange tubes were different!
As shown in the picture, the hollow tube on the left was where the water (from the tank) would enter from. It would then pass through the heating element to get heated and form steam. The steam would then exit through the tube with a check valve (ball) on the right.
The tube on the right was also connected to a white tube, which was connected to the condenser. Since the steam is of higher pressure than the pressure in the white tube, it will push the ball upwards so that it can flow through the tube.
The steam will then condense in the condenser to form water. The water will then drip down to the filter paper and dissolve the coffee powder such that it gets filtered through the filter paper.
The coffee will then drip into the jug to be collected.
Air Lift Pump
In this experiment, we had to determine if the submergence ratio would affect the pump flow rate.
First, we measured the length of the pipe and taped masking tape on the green pipe as an indication of the water level against the green pipe.
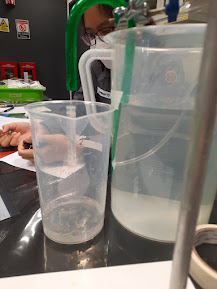
We then placed the green pipe against the side of the jug such that its outlet was facing outwards (not inside the jug). This was so that we could collect the water using another container in order to determine the pump flow rate.
We set intervals every 10, 20, 30, and 40 seconds to see the volume of water collected in the jug. Then, we took the average to determine the flow rate.
In order to follow the experimental setup, one of the problems our group faced was how we should maintain the position of the pump above the water. We decided to stack the boxes and tape the pump on top so that it won't fall. This would ensure it would remain above the water level securely.
The higher the static lift, the higher the pump flow rate would be. A lower static lift would lead to a lower pump flow rate, as shown in the video. The flow of the water was choppy instead of being a continuous flow.


Comments
Post a Comment